

Why Tire Pressure Is Worth Getting Right
Tire pressure is one of the few maintenance items that costs nothing to check and affects nearly everything about how your vehicle performs. Correctly inflated tires improve fuel economy - underinflated tires create more rolling resistance and can measurably reduce gas mileage. They also wear more evenly, last longer, and handle more predictably in emergency situations. Overinflation carries its own risks: a harder tire has a smaller contact patch with the road, which reduces grip and makes the ride harsher.
If you've come across claims that running higher-than-recommended pressure improves fuel economy, our gas mileage myths breakdown explains why that trade-off isn't worth it. Tire pressure checks fit naturally into the broader routine covered in your car's maintenance schedule - once a month and before any long trip is the widely recommended interval.
Underinflation Is a Hidden Safety Risk
A tire that looks fine can still be significantly underinflated - visual inspection alone is not reliable below about 50% inflation loss. Underinflated tires run hotter, wear faster on the outer edges, and are more prone to blowouts at highway speeds. If your dashboard TPMS (Tire Pressure Monitoring System) light is on, a tire is already at least 25% below the recommended PSI - address it promptly. Learn more about what that warning light means in our dashboard warning lights guide.
Beyond fuel and wear, there's a handling dimension: a tire that's significantly low on one side of the vehicle can cause a noticeable pull, and a sudden blowout at highway speeds is one of the more dangerous situations a driver can face. Routine checks - taking less than ten minutes - are among the highest-value habits in everyday car ownership.
Temperature Swings Affect Pressure Year-Round
Tire pressure drops roughly 1 PSI for every 10°F decrease in ambient temperature. That means a tire correctly inflated on a 70°F day may be 4-5 PSI low on a cold winter morning. Check pressure at the start of each new season, and more frequently during periods of rapid temperature change. For a broader look at seasonal vehicle preparation, see our seasonal car care guide.
What You Need Before You Start
The tools required are minimal and inexpensive. A basic stick-type gauge is reliable and accurate enough for routine checks; digital gauges are easier to read in low light. Either type works fine as long as it's in reasonable condition - a gauge you've carried in a glovebox for a decade without testing it against a known standard may have drifted.
Tire pressure gauge
Measures the air pressure inside each tire in PSI (pounds per square inch).
Portable air compressor
Lets you add air to tires at home or roadside without visiting a gas station.
Valve stem cap
Protects the valve stem from dirt and moisture; replace any that are missing.
What you will need
One thing you don't need: a trip to a shop. This is a task any driver can complete at home or at a gas station, assuming you have access to an air source. Many gas stations provide air at no charge; others charge a small fee. A portable compressor gives you the flexibility to handle low tires anywhere.
Don't Rely on the Tire Sidewall for Your PSI Target
The number stamped on the side of a tire (e.g., "Max. Press. 51 PSI") is the tire's maximum safe pressure, not the pressure your car should run at. Using that number as your target can cause overinflation, a stiff ride, uneven center tread wear, and reduced traction. Always use the vehicle manufacturer's specification from the door jamb sticker or owner's manual.
Step-by-Step: Checking and Adjusting Tire Pressure
Follow the steps below in order. The whole process should take under 15 minutes for all four tires and the spare. Pay attention to the cold-tire rule in step 2 - it's the single most common reason drivers get inaccurate readings.
Find your vehicle's recommended PSI
Open the driver's door and look for a sticker on the door jamb - it lists the recommended tire pressure for your front and rear tires separately. This figure, measured in PSI (pounds per square inch), is your target. Do not use the maximum PSI number molded into the tire sidewall; that's the tire's structural limit, not the pressure your vehicle is engineered to run at.
Check the tires while they're cold
Tire pressure readings are only reliable when the tires are cold - meaning the vehicle has been parked for at least an hour and driven fewer than one mile since. Driving heats the air inside the tire, which expands it and inflates the reading by 4-6 PSI. If you've already driven, note the current readings and compare them to cold-PSI targets after the tires have cooled.
Remove the valve stem cap and seat the gauge
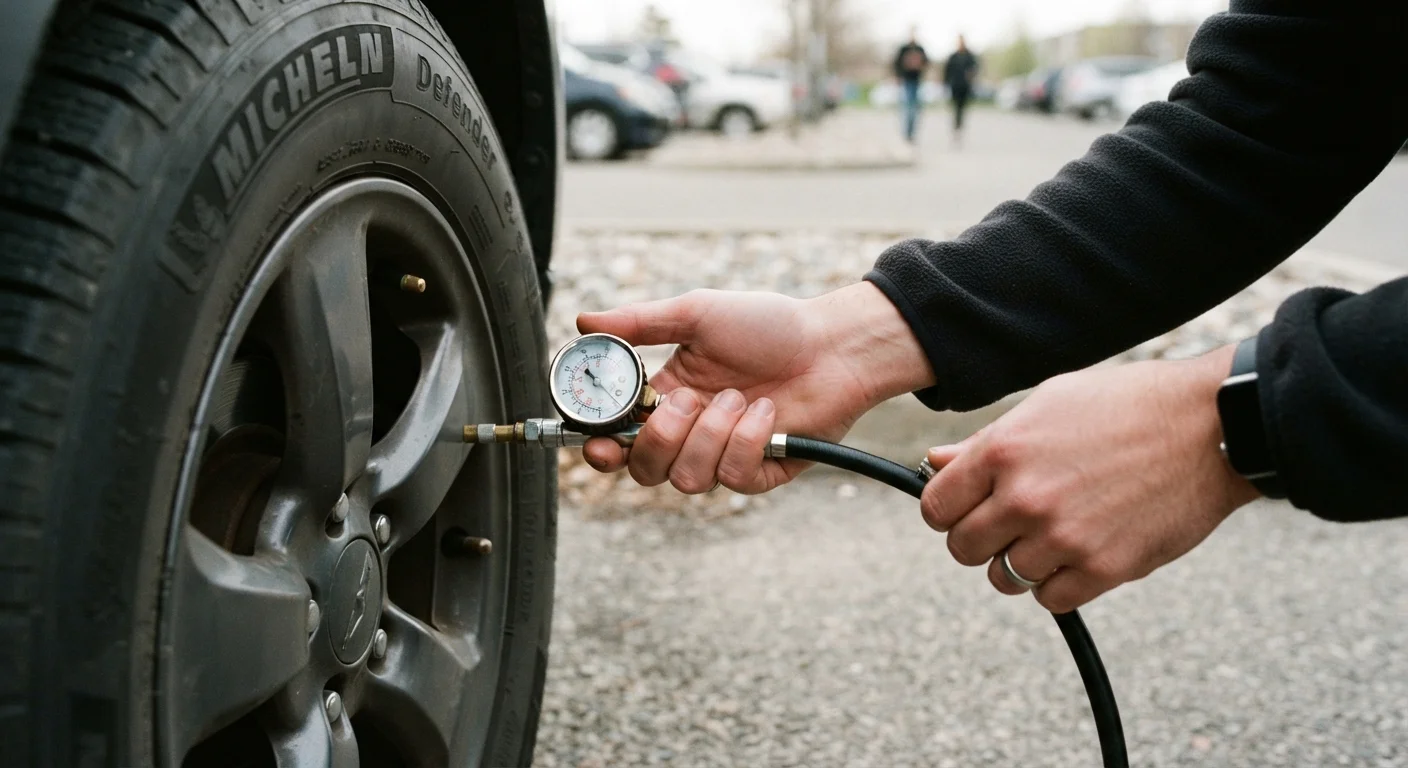
Unscrew the small plastic cap from the valve stem on the first tire and set it somewhere safe - losing one is easy. Press the open end of your gauge firmly and squarely onto the valve stem. With a stick gauge, the pressure bar will pop out; with a digital gauge, you'll hear a brief hiss and see a reading appear. A sustained hiss means the gauge isn't fully seated - reposition and try again.
Read and record the pressure
Note the PSI shown on your gauge and compare it to the recommended figure from step 1. Write down the reading for each tire - memory is unreliable when you're moving around a vehicle. A tire that's 5 PSI or more below target needs air immediately. A tire consistently losing pressure warrants a professional inspection for a slow leak or valve issue.
Add or release air as needed
If a tire is low, attach your air compressor's hose to the valve stem and add air in short bursts, rechecking with the gauge between each burst. If a tire is overinflated, press the small pin inside the valve stem - a pen cap or the relief nib on many gauges works - to release air in brief increments, checking pressure after each release. Aim to land within 1-2 PSI of the target rather than chasing the exact number.
Replace caps and check the spare
Hand-tighten the valve stem caps on all four tires. Then locate your spare - whether it's a full-size spare or a compact temporary spare - and repeat the gauge check. Spare tires are frequently forgotten and often found flat when actually needed. A compact spare typically requires a higher PSI (often 60 PSI), so consult your owner's manual for the correct figure.
Once you've established a monthly routine, you'll also develop a feel for how your tires behave over time. A tire that consistently loses a pound or two each month - without any obvious damage - can indicate a slow leak at the valve stem or a micro-puncture worth having a technician examine. Tire health connects directly to overall vehicle safety; for a fuller picture of what to inspect and when, your car's maintenance schedule decoded is a useful companion reference.
The content provided on our blog site traverses numerous categories, offering readers valuable and practical information. Readers can use the editorial team’s research and data to gain more insights into their topics of interest. However, they are requested not to treat the articles as conclusive. The website team cannot be held responsible for differences in data or inaccuracies found across other platforms. Please also note that the site might also miss out on various schemes and offers available that the readers may find more beneficial than the ones we cover.