

Start With a Full Purge
The single biggest mistake homeowners make is buying shelving and bins before they know what they're storing. Pull everything out of the garage entirely - yes, everything - and sort it into four categories: keep, donate, trash, and relocate. Items that belong inside the house (spare batteries, holiday dishes, cleaning supplies) should go back inside. Items in a third category of "maybe" usually become trash within a year.
Be honest about frequency of use. A camping stove used once a decade does not deserve prime floor space. If you haven't touched something in two full seasons and it has no clear future use, let it go. For a broader framework on this thinking, see this practical introduction to home organization before you begin.
Don't Skip the Hazardous Materials Sort
During your purge, set aside all chemicals, aerosols, old paint, pesticides, and motor fluids for separate handling. Many cannot go in standard trash. Most US counties offer free household hazardous waste (HHW) drop-off days - check your municipality's website for the nearest facility. Disposing of these items improperly can create environmental and legal liability.
Map Your Garage Into Zones
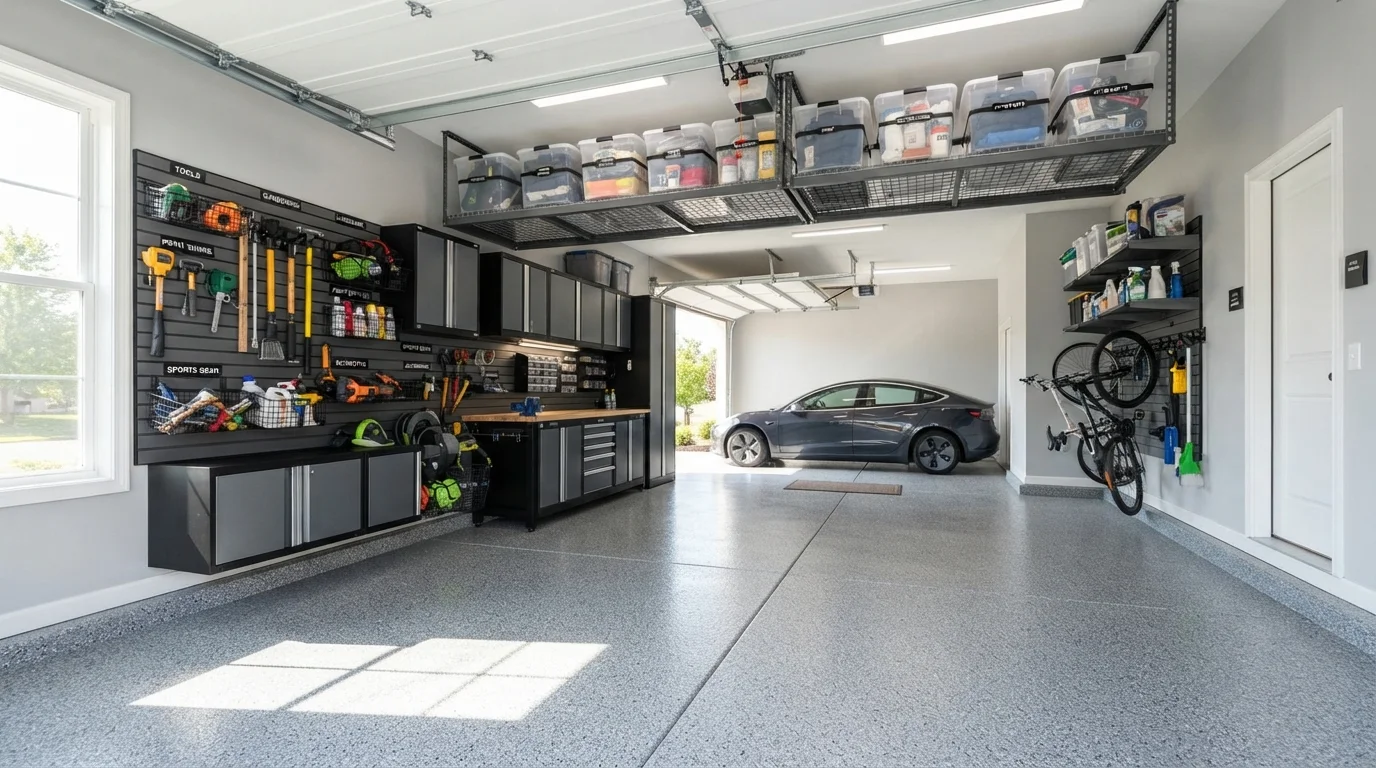
Once you know what you're keeping, assign every category a dedicated zone rather than scattering items wherever space allows. Common garage zones include: automotive (fluids, jumper cables, tools), lawn and garden (mowers, fertilizer, hoses), sports and recreation, seasonal décor, and a general workshop or workbench area.
Zones work because they reduce search time and make it obvious when something is out of place. The Zone Method explains this activity-based logic in depth and applies it across every room in the home. In a garage, place the highest-use zones closest to their point of use - garden tools near the side yard door, automotive supplies near the car's driver side.
Before installing any wall-mounted system, use a stud finder and mark all stud locations with painter's tape across the full wall. Planning your bracket positions around actual studs - not drywall anchors - means your storage will safely hold real weight.
Garage walls carry significantly heavier loads than interior walls. Drywall anchors are appropriate for pictures; they are not rated for loaded shelving or tool storage.
Store hazardous materials - paint, solvents, pesticides, fuel - in a locked, ventilated metal cabinet positioned away from ignition sources and the main living area entry door.
Many common garage chemicals are flammable or toxic. Proper segregated storage reduces fire risk and prevents accidental exposure, especially in households with children.
Maximize Vertical and Overhead Space
Most garages have 8-10 feet of wall height, yet storage often stops at eye level. Wall-mounted panel systems (pegboard, slotted metal, or wire grid) let you hang tools, bikes, cords, and bins at varying heights without consuming floor space. Freestanding shelving units work well for heavy items like paint cans and power tools but should be anchored to the wall stud to prevent tipping - a step that is both a safety requirement and a code expectation in many jurisdictions.
Overhead ceiling storage platforms, suspended between joists, are ideal for lightweight seasonal items: holiday decorations, camping gear used a few times per year, or spare sporting equipment. Keep weight per platform within the manufacturer's rated load - typically 250-600 lbs depending on construction. For more ideas on finding storage in overlooked spaces, see underused spaces that could double your storage.
Floor Planning and Traffic Flow
Draw a simple sketch of your garage footprint before moving anything back in. Mark where doors swing, where the car parks, and where people naturally walk. Maintain a clear path at least 36 inches wide along any route to an entry door - this is both practical and a general fire-safety principle. Avoid positioning tall shelving units where they block natural light from windows or obstruct the garage door sensor's line of sight.
Heavy, bulky items (chest freezers, riding mowers, compressors) should be positioned first since they're hardest to reposition later. Work the smaller storage units around them. If your garage doubles as a workshop, position the workbench under or near a window for natural light, and keep a clear 3-foot radius around power tools. This room-by-room organization checklist can help ensure no element of the space gets overlooked.
55%
Homeowners who can't park a car in their garage
A survey conducted by Gladiator GarageWorks found that roughly 55% of American homeowners report their garage is too cluttered to fit a vehicle.
36 in
Minimum clear egress path width recommended
General fire-safety guidance recommends at least a 36-inch clear path to exit doors in enclosed spaces used for storage or work.
$1,500-$5,000+
Typical range for professional garage organization
HomeAdvisor and similar sources indicate professional garage storage installations range widely depending on square footage and cabinet selection.
Storage Solutions That Fit Any Budget
Effective garage storage does not require a full custom cabinet installation. Here's a tiered approach by investment level:
- Low cost: Repurposed wooden pallets as wall-mounted tool racks, mason jars screwed through their lids to a shelf board for small hardware, and tension rods between shelves for hanging spray bottles.
- Mid-range: Wire shelving units, pegboard panels with hook assortments, clear stackable bins with printed labels, and ceiling-mounted bike hooks.
- Higher investment: Slatwall panel systems with interchangeable accessories, metal freestanding cabinets with locks, and custom-built workbenches with integrated drawer units.
Regardless of budget, label everything. A label maker is not a luxury - it reduces the time other household members spend searching, which is how garages stay organized long-term. Familiarize yourself with common storage terminology using this plain-language reference for home organization terms.
Seasonal Upkeep and Maintaining Order
A garage reorganization isn't a one-time event - it requires two brief seasonal reviews each year, typically spring and fall. In spring, rotate summer gear (lawn equipment, outdoor toys, garden tools) to accessible positions and move winter items (snow blower, ice melt, sleds) to overhead or back-wall storage. In fall, reverse the process. Each review is also an opportunity to discard worn-out items before they accumulate.
Adopt a one-in-one-out rule for categories prone to overflow: sports equipment, power tools, and garden chemicals. When a new item enters, an old one leaves. Post a short zone map on the inside of a cabinet door so every family member knows where things belong - shared systems only work when everyone understands them. For broader home improvement strategies that complement garage organization, explore related projects like weatherstripping, lighting upgrades, and floor coatings that make maintenance easier over time.
The content provided on our blog site traverses numerous categories, offering readers valuable and practical information. Readers can use the editorial team’s research and data to gain more insights into their topics of interest. However, they are requested not to treat the articles as conclusive. The website team cannot be held responsible for differences in data or inaccuracies found across other platforms. Please also note that the site might also miss out on various schemes and offers available that the readers may find more beneficial than the ones we cover.